Logging in to the Application:
Log into the application using your NetID and password.
Once in you will be asked to select a college code. Select the college you’re associated with, not the college of student’s enrollment.

The Home Page:
After selecting a college you are taken to the Home page. Select a student to run a degree audit by selecting Search under Students on the menu bar or by clicking the Students icon.
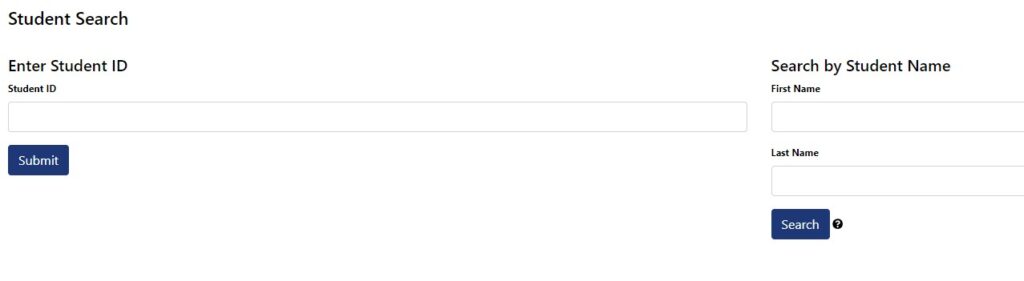
Clicking the Students icon takes you to the student search page. If you know the student UIN you can enter it in the Student ID field. You can also do a search by student name.
Requesting an Audit:
From the menu bar seen in the image below you can request a degree audit, view the student’s coursework, view any exceptions that have been entered by AROs, view the transfer course evaluations for the student, or view the student profile (includes the student’s default degree program along with the student name and UIN).
Our test student has the UIN TEST.

You do not need to complete step 1 above. Clicking the Submit button takes you here:
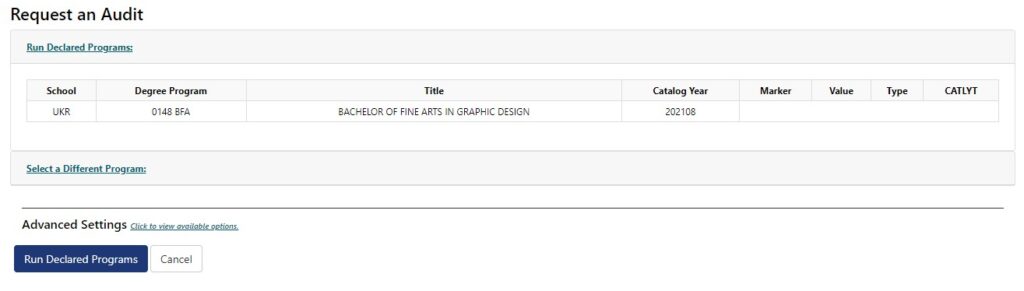
You can run the declared degree program or you can run a different program by clicking Select a Different Program.
Use Click to view available options to run an audit using planned (what-if) courses.
Once you submit your degree audit request you will be taken the completed audit request page.
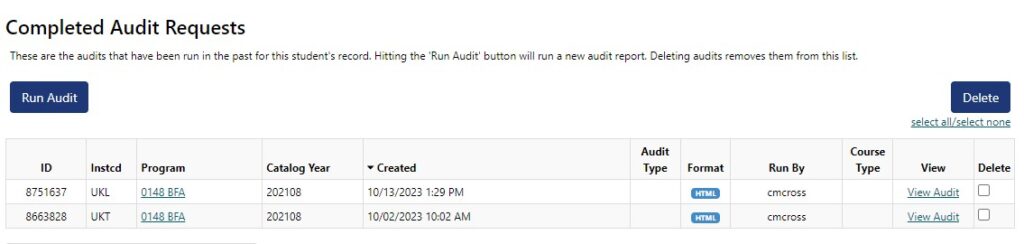
Click on the Program name or View Audit link to see the completed degree audit.
At the top of the audit you will see charts and graphs.
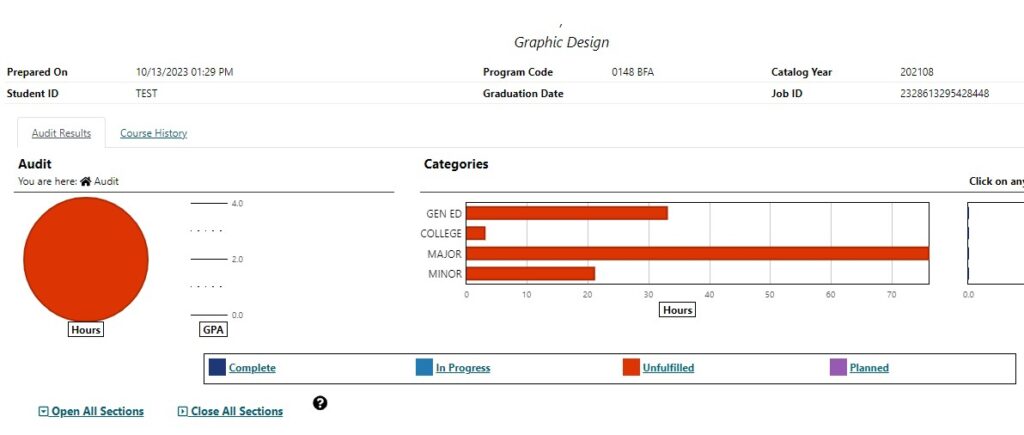
The audit displays an Hours pie chart which is depiction of the total hours required for a degree. Next to it is a GPA chart which will normally be the student’s University of Illinois grade point average.
To the right of the Audit chart is the Categories chart area. Each degree program in u.Achieve has requirements marked for display here by category – for example, general education requirements, major requirements, etc.
If you roll your cursor over any chart you will see the hours associated with that part of the chart.
From the graphs, scroll down to see the rest of the audit. This is a typical requirement.
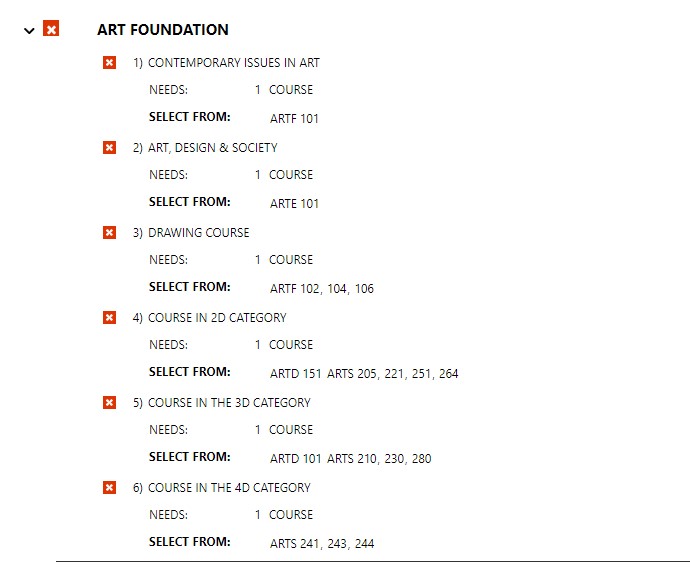
Chart Drill Down Feature:
You can drill down to see what requirements make up each category by clicking on the chart. For example, clicking on the GEN ED chart takes you here:
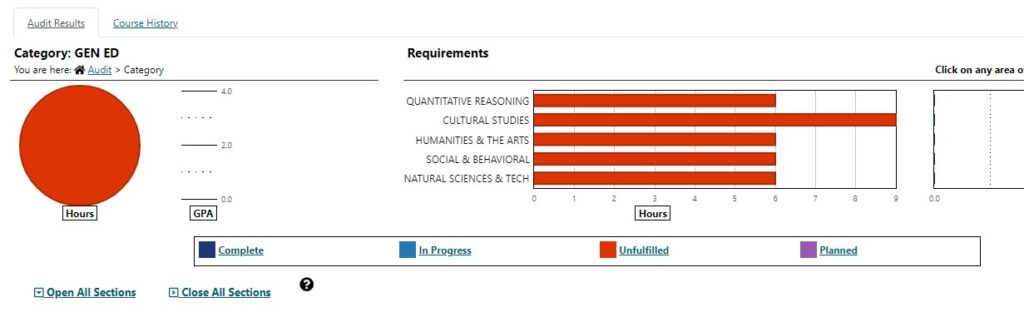
If you click one of the requirements that make up the General Education category you will drill down further to see the sub-requirements that make up that particular general education requirement. NOTE: The audit part of this screen changes from the entire audit to just the requirements that make up the category.
Tabs:
There are two tabs in the chart section of the audit – Audit Results and Course History. Clicking the Audit Results tab will display the degree audit. Clicking Course History tab takes you to a term by term course history.

Adding Planned (What-If) Courses:
You can get to the Planned Coursework page from the Student menu bar.
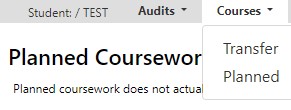
Once you’ve selected Planned in the Courses dropdown, you may now enter courses to add as planned, but be sure to leave the correct number of spaces between the subject (MATH) and number (220). There should be 6 total characters, including spaces for the subject. (MATH 220) You must indicate term, hours and grade for the course.

When you have added Planned Courses, return to the Audits dropdown and request a new audit, but instead of Run Declared Programs, select Click to view available options in Advanced Settings.
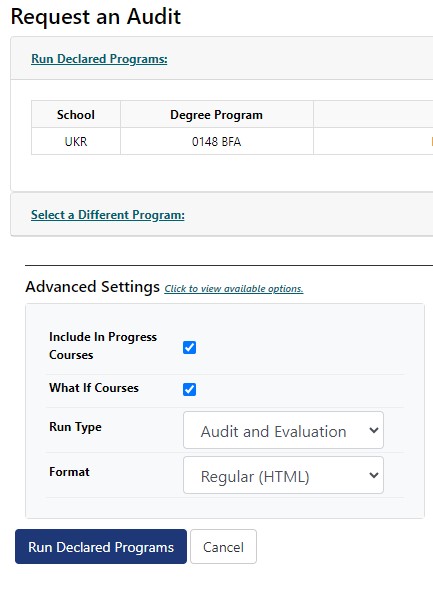
Check the What If Courses box and then Run Declared Programs. You should see the planned courses in the audit; they are marked with a W to the right of the course information.